A contextual menu is also available for each task, by left-clicking on the task with the mouse.
- Modify :
Opens the task. A simple double-click on the task will do the same thing.
- Copy:
A useful method for reproducing the task exactly. As in Word, simply Copy your task, then Paste it (the Paste option displays when you have copied data into the clipboard) onto another resource (row) in your Gantt. Unlike in many programs, CTRL+C and CTRL+V have no effect here.
- Lock date :
Generally used with the APS, locking a task’s date in simple planning mode has no effect other than to indicate a higher priority status for the task (visible in the “Advanced” tab).
- Split:
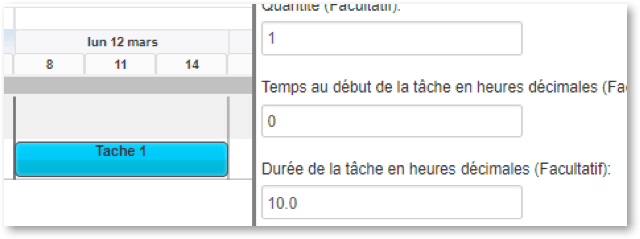
Splitting the task allows you to divide the initial duration of the task into smaller pieces. For example: Let’s say you need to divide Task 1, which is 10 hours in duration and scheduled on March 12, into two tasks, one on March 14, the other on March 20.
Left-click on the task and choose “Split” from the contextual menu to pull up a configuration panel.
To obtain the division you need, click on the blue “+” button, then select a start date (March 14) and end date (March 15). The end date must be at least one day later in order to display the task.
The duration to be divided, based on the original 10 hours, should be entered in the Time2 column.
You can do this for as many sub-tasks as you wish, provided you don’t exceed the original 10-hour duration.
When you are done, click on “Done” to complete the action and see the two sub-tasks in your schedule. Task 1 is no longer visible.
The new tasks use the space of an entire day on your Gantt but they retain the desired divisions of duration.


For this feature to work, you must not exceed the initial duration of the task.
- Delete :
Deletes the selected task (the delete key on your keyboard has no effect).
- Subsequent Link :
This function allows you to assign an order for the processing of and priority among tasks.
In order to create this link, you will first need to have created the Subsequent Link from the previous task. That task is in blue, to indicate it is waiting for a second anchoring point.

Right-click on the preceding task, and select Preceding link from the contextual menu that pops up. This will create the link from the preceding task to the current task.
It is evidently possible to create this link across different resources (different row levels). You can also create more than one preceding link towards the same subsequent task.
Negative links (with reversed sense of priority) are possible within Planilog. To display such links, you must go into the “Views” menu (see “Function Bar Menus” section below). These links will appear in red.
- Preceding link duration :
It is also possible, when selecting a preceding task, to choose the contextual menu item “Preceding link duration.” Unlike the previous option, this one sets a minimum period of time between the two tasks. This would allow, for instance, the schedule to comply with a cooling or drying time for the part before it proceeds to the next step in the production chain.
- Display links :
Depending on how you’ve configured display settings in the Views menu in the Function Bar, it is possible to hide links to simplify your Gantt for legibility. By selecting Display links from the context menu while right-clicking on a given task, you can temporarily display the link(s) connected to the selected task (until the next screen refresh).
Displaying links only works if the selected task has linked tasks. If you’re not certain, opt for “Display Links” in the “Views” menu (see “Function Bar Menus” section below) which will reveal all existing links in your time frame.
- End :
Ending a task has a number of consequences for your planning. In particular, it informs the system that the task is no longer active for(APS) purposes, and thus can no longer be sequenced optimally.
Visually, placing the task in Ended mode greys out the task. If you wish to “un-end” the task, click on the Advanced tab and modify its Status.
- Alert :
Performs the same action described in the Priority field above in the Advanced Tab. You can apply a dotted-line alert around your task. To remove, simply unselect from the contextual menu.
- Start/Stop/See tracking :
The tracking feature allows for the time-stamping of a task in order to measure the exact time when the task completes. Each task can be tracked individually, or you can view a tracking synthesis in the Tracking module.


